Project Templates allow you to create multiple incidents with the click of a button. If you ever have an IT project that results in multiple incidents needing to be created, this feature gives you the ability to create those incidents at one time and assign them to a project for future reporting.
How to Create a New Project Template
- Click on the Add link in the Action menu and click the Project Templates link.
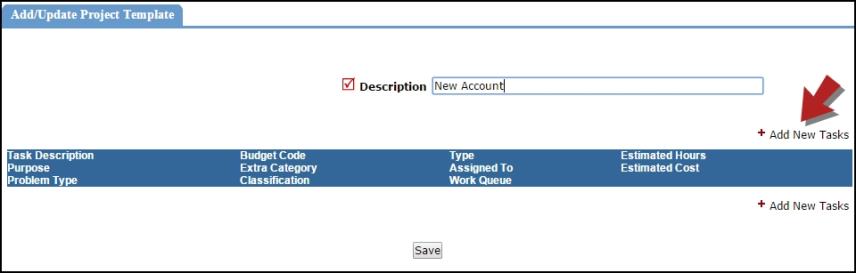
- Enter a Description or name for your template, such as "New Account."
- Click the Save button.
- Click the +Add New Tasks link on the right side of the screen.
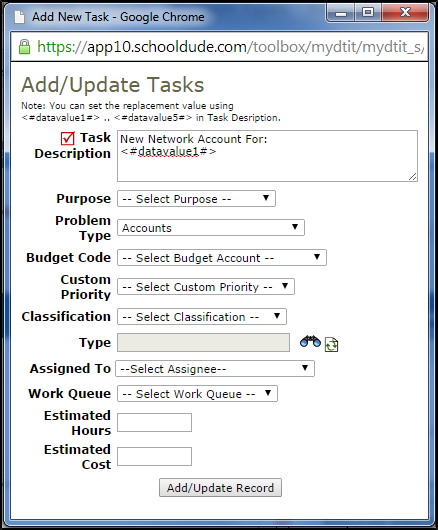
- Enter the Task Description. This is the only required field for the task. You can set replacement values in the description by using <#datavalue1#> through <#datavalue5#> in your Task Description. For example, you can enter the description as “Setup Account for <#datavalue1#>.” When you create the incidents you can replace <#datavalue1#> with the name John Smith. The incident description will read “Setup Account for John Smith.” You can have up to 5 replacement values per query.
- The other fields are optional; however we recommend filling in as many as possible so the information will automatically populate on the incident.
- If you are using Problem Types to route work to specific technicians or Work Queues, make sure you select it from the drop down list. If you are not routing by Problem Type, then you can assign the task directly to a technician or Work Queue by selecting it from the appropriate drop down.
- Click Add/Update Record and continue to add tasks until you are done.
How to Create Incidents from a Project Template
Once you have created a Project Template and added all of the tasks, you can start using it to create incidents.
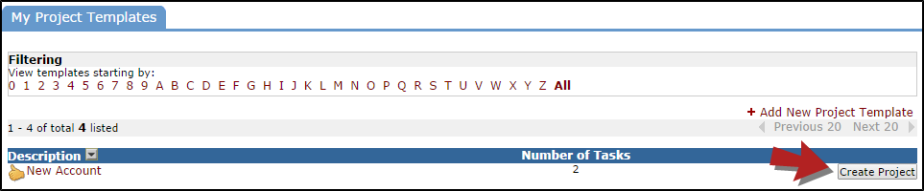
- Return to the Project Template list; or click on the List link in the Actions menu and click the Project Templates link.
- Click the Create Project button next to the template you want to use.
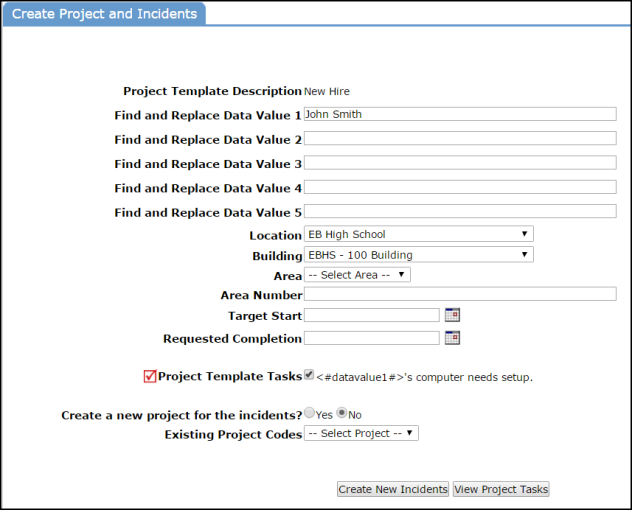
- Enter any Data Values you want to replace. For example, Data Value 1 = John Smith.
- Assign the Location, Building, and Area information and set a Target Start date and Requested Completion date if needed. These fields are optional.
- Check the Tasks that need to have incidents created for the project.
- Decide if you would like to create a new Project Code that will include these incidents. If you select Yes, you will then need to enter a name for the new Project Code in the field provided. If you select No, you can select an existing Project Code from the drop down list if needed.
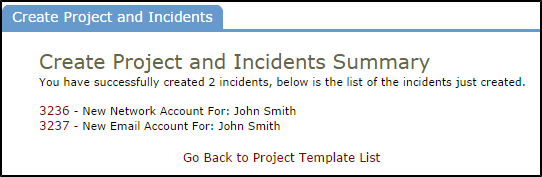
- Click the Create New Incidents button. The system will create a separate incident for each task in your list.
- You will then be able to view the incidents created from the template.